
A Beginner’s Guide to Growing Natal Mushrooms (The “Overlay-Free” Method)
Welcome, fellow mushroom enthusiasts! Today, we’re diving into the world of a truly special species: Psilocybe ochracentreatta, affectionately known by growers as “Nats” or Natal Super Strain.
What are Nats, and Why Should You Grow Them?
Originating from the Natal region of South Africa, these mushrooms are close cousins to the famous Psilocybe cubensis. For a long time, many growers (myself included!) thought they were just a variety of cube, especially since they can be cross-bred. However, genetic testing has confirmed they are a unique species with their own distinct characteristics.
In my opinion, Nats are superior to cubes in almost every way. Veteran growers are increasingly making the switch, and for good reason:
- Faster Colonization: The mycelium is incredibly aggressive and grows quickly.
- Greater Potency: They generally pack a bigger punch.
- Unique Experience: Many report a “cleaner” and more “focused” journey.
- Contamination Resistant: Their vigorous growth helps them fight off mold and bacteria.
- Heat Tolerant: They can handle warmer temperatures better than many other species.
The Big Challenge: Overlay
If Nats are so great, what’s the catch? One word: overlay.
Overlay is a thick, rubbery mat of mycelium that forms on the surface of your substrate. It’s believed to be a stress response, and it can stall your project by physically preventing mushrooms from pinning and growing. It’s the number one issue that frustrates new Nat growers.
But don’t worry! This guide is designed to tackle that problem head-on. After much trial and error, I’ve found that two simple adjustments can prevent overlay in about 8 out of 10 grows:
- A Low Spawn-to-Substrate Ratio: We’ll use less grain spawn than usual.
- A Tightly Compressed Casing Layer: This is the secret weapon.
Let’s get growing!
What You’ll Need To Grow P. Natalensis
Equipment:
- 5-gallon bucket with a lid
- 56-quart monotub, modified for air exchange (with a liner)
- An oscillating fan and a timer
Ingredients & Genetics:
- Psilocybe ochracentreatta genetics (Liquid Culture is recommended)
- 2 lb sterilized grain bag (Milo works well)
- 7 lbs of CVG substrate (recipe below)
- 1 lb of Casing Mix” (recipe below)
Part 1: Preparation (Do This First!)
A successful grow starts with good prep. Let’s make our substrate and casing mix before we do anything else.
How to Prepare Your CVG Substrate
This recipe is for one tub.
- 1 brick of coir (about 1.4 lbs)
- 4 quarts of vermiculite (fine or coarse)
- 1 cup of gypsum
- Place the coir brick, vermiculite, and gypsum into your 5-gallon bucket.
- Carefully boil 4 quarts of water and pour it directly over the dry ingredients in the bucket.
- Immediately seal the lid to trap the steam. Let it sit for 1 hour to pasteurize.
- After an hour, mix it thoroughly. You can do this by sealing the lid tightly and shaking the bucket vigorously. If needed, you can gently roll it or tap it on the ground to break up any clumps.
- Let the sealed bucket sit for another 5-6 hours until it has completely cooled to room temperature. It’s now pasteurized and ready to use.
How to Prepare The Casing Mix
This mix is a simple 1:1:1 ratio of peat moss, coir, and vermiculite.
- In a separate container, combine 2 quarts of peat moss and 2 quarts of vermiculite.
- Add 1.5 quarts of boiling water, mix well, and let it sit for a couple of hours to cool and hydrate.
- Once cool, mix in 2 quarts of your already-prepared (and cooled) CVG substrate.
- Your casing is now ready. You can make a larger batch and store it in a sealed bucket for up to 6 months.
Part 2: The Grow Process (Step-by-Step)
Step 1: Inoculate Your Grain
Inject your grain bag with 5-10cc of liquid culture. Place the bag in a dark place at room temperature. The mycelium of Nats is fast and rhizomorphic (rope-like). Once the bag is about 30-50% colonized, break up the grain inside the bag and shake it well to distribute the growth. Let it finish colonizing, which should take about three weeks in total.
Step 2: Spawn to Bulk (Mixing Day)
Your grain is fully colonized and it’s time to mix it with your substrate! Work in a clean area with no fans or drafts.
- Bring your bucket of cooled CVG substrate and your colonized grain bag to your workspace.
- Thoroughly break up the colonized grain inside the bag one last time.
- To minimize air exposure, work quickly. Open the top of the grain bag and dump it into the bucket with the substrate.
- Put the lid back on the bucket and mix everything together thoroughly. Shake and tumble the bucket until the grain is evenly distributed. You want a light, fluffy, and consistent mixture.
Step 3: Fill Your Tub and Apply the Casing
- Pour the mixed substrate and grain from your bucket into your monotub with its liner. Spread it out into a flat, even layer.
- Take your prepared casing mix and spread it evenly over the entire surface of the substrate.
- Now for the most important part: wearing clean gloves, gently but firmly press down on the casing layer. You want to compact it much more tightly than you would for other mushroom species. This firm, compressed layer is key to preventing overlay.
Step 4: Colonization
Seal your monotub and place it in a dark area at room temperature for 8-12 days. Don’t disturb it. During this time, the mycelium will grow through the substrate and up into the casing layer.
Step 5: Introduce Fruiting Conditions
Once the casing layer is about 80% covered in white mycelium, it’s time to start fruiting!
- Light: Introduce a 12-hours-on, 12-hours-off light cycle.
- Misting: I mist the surface directly just once a day, in the morning, with 6-8 light sprays of water. Some say direct misting causes overlay, but with this method, it works perfectly fine.
- Fresh Air (Fanning): This is critical. I fan my tubs 4 times a day, roughly every 6 hours. The easiest way to do this is with a small oscillating fan placed 5-6 feet away from the tub on its lowest setting. Set it on a timer to run for 15-30 minutes each time. The gentle breeze flowing over the tub’s air exchange holes is enough to push out CO2 and pull in fresh oxygen.
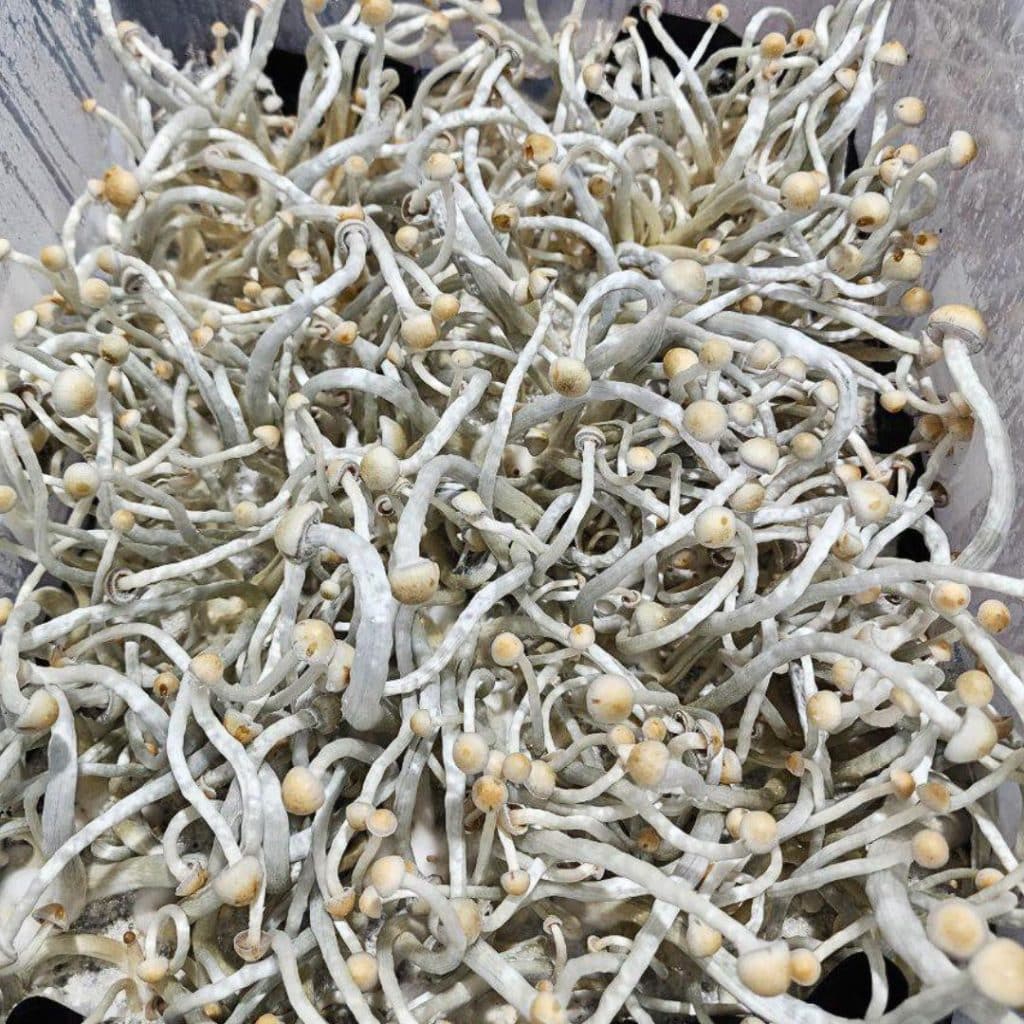
By combining the low spawn ratio with the tightly packed casing, you should see beautiful pins forming within 7-10 days, without any overlay issues.
Step 6: Harvest and Repeat
Once your mushrooms are mature, it’s time to harvest! After you’ve picked your first flush, you can rehydrate your substrate by cold-shocking it (soaking it in cold water) for a few hours. Drain the excess water and put it back into fruiting conditions. You can typically get up to 3 flushes before the substrate is spent.
Enjoy the fruits of your labor! 🍄