
A Simple Pan Cyan Tek – A GordoTEK to Consider
Forget humidifiers, fans, tents, and timers. This Pan Cyan grow guide utilizes a basic unmodified tote and simple techniques, making it perfect for cultivators of all levels, from beginners taking their first foray into mycology to seasoned growers looking for an efficient and low-maintenance approach. This comprehensive guide will walk you through each step, ensuring you have all the knowledge necessary to cultivate potent Pan Cyans with ease. This method is attributed to GordoTEK and we thank him for always striving to simplify the process. His contributions to this hobby are unmatched.
Why This Tek Stands Out
This method prioritizes ease of use and minimal equipment, making it incredibly accessible. It’s particularly well-suited for Pan Cyans, known for their love of warmth and humidity. Plus, it’s adaptable to various environments, even those with less-than-ideal conditions like cold, dry rooms. Whether you’re working with limited space or resources, this tek offers a streamlined path to successful cultivation.
The Foundation: Starting with Strong Genetics
Your journey begins with quality Pan Cyan genetics. Sourcing spores from a reputable vendor or cultivator known for producing robust and high-yielding strains is crucial. (The author mentions their own high-performing TTBVI strain, a consistent winner in mycology competitions, and offers spores to patrons).
From there, you can create a spore syringe or utilize the agar method for isolating specific genetics. Working with agar allows you to select and cultivate a single strain, ensuring consistency in your grow. A laminar flow box can further enhance sterility and reduce contamination risks during this process, providing a clean working environment for handling spores and agar plates.
Grain Spawn and Substrate: Fueling Mycelial Growth
Use a sufficient amount of fully colonized grain spawn (around 64oz or 1500ml for a full-size grow). The grain serves as the initial food source for your mycelium, providing the necessary nutrients for robust growth. Once your grain is fully colonized, it’s time to prepare the substrate.
This tek utilizes a unique substrate recipe tailored to Pan Cyan’s preferences. The core ingredients include coco coir, vermiculite, aged manure, gypsum, and water. Coco coir provides a suitable growing medium, vermiculite improves aeration and water retention, aged manure adds essential nutrients, and gypsum helps regulate pH levels.
Preparing the Perfect Substrate for Pan Cyans
Creating the ideal substrate is crucial for robust mushroom growth. This recipe caters specifically to the needs of Pan Cyans, providing them with the nutrients and texture they need to thrive. Here’s a breakdown of the ingredients and how to prepare them:
Ingredients:
- Coco Coir: 300g (or 150g for a half recipe). Coco coir is a popular growing medium due to its excellent water retention and aeration properties.
- Hydration: Begin by hydrating the coco coir with 3000ml of hot water (1500ml for a half recipe). Place the coir in a clean bucket, pour the hot water over it, and cover the bucket. Allow it to sit for about 45 minutes, giving the coir ample time to absorb the water. It’s perfectly fine if the mixture appears soupy at this stage, as we’ll adjust the moisture content later.
- Heating the Water: To ensure proper hydration, use very hot water. You can start with hot tap water and then microwave it for about 10 minutes to raise the temperature further.
- Measuring Coir: A kitchen scale is the most accurate way to measure coir. However, if you don’t have one, approximately 8 cups of loosely packed, shredded coir is roughly equivalent to 300g.
- Vermiculite: Approximately 1650ml (7 cups). Vermiculite is a mineral that improves aeration and drainage in the substrate.
- Measuring Tip: If you’re using a 9×13 inch pan to measure ingredients, filling it halfway will give you approximately 1650ml of vermiculite.
- Aged Manure: Approximately 3300ml (14 cups). Aged manure is a valuable source of nutrients for your mycelium.
- Sourcing Manure: Look for well-aged manure from herbivorous animals. Horse manure is a popular choice, and you can often find local sources by searching online or visiting nearby stables. Older manure is preferable, as fresh manure can be too strong and may inhibit mushroom growth. If finding horse manure is challenging, consider alternatives like cow manure or even chicken manure. Commercial brands like Black Kow are also available online and at some garden centers.
- Variety of Manures: While horse and cow manure are common, feel free to experiment with manure from other herbivores. Some cultivators have reported success with tortoise, elephant, and even water buffalo manure!
- Gypsum: 1/4 cup (approximately 60ml). Gypsum is optional but can be beneficial for regulating pH levels in the substrate.
- Hot Tap Water: 1000 to 2000ml. This water will be used to fine-tune the moisture content of the substrate.
Mixing the Substrate:
- Combine Ingredients: Once you’ve gathered all your ingredients, it’s time to mix them. A 5-gallon bucket or a large tote works well for this. Add the hydrated coco coir, vermiculite, and aged manure to your mixing container. Sprinkle in the gypsum if you’re using it.
- Achieving Field Capacity: Slowly add hot tap water while mixing the ingredients by hand. The goal is to reach “field capacity,” which means the substrate is moist but not overly saturated. To test for field capacity, grab a handful of substrate and gently squeeze it. If only a few drops of water come out, you’re at the right consistency. If water streams out, it’s too wet.
Simplifying the Ratios:
A good rule of thumb for this substrate recipe is:
- 4 parts hydrated coco coir
- 2 parts aged manure
- 1 part vermiculite
- Plus a handful of gypsum (optional)
This simplified ratio makes it easier to adjust the recipe based on your needs, whether you’re doing a full-size grow or a smaller batch.
Sterilize the substrate in mycobags or jars using a pressure cooker. This crucial step eliminates competing contaminants, ensuring your mycelium has a pristine environment to colonize.
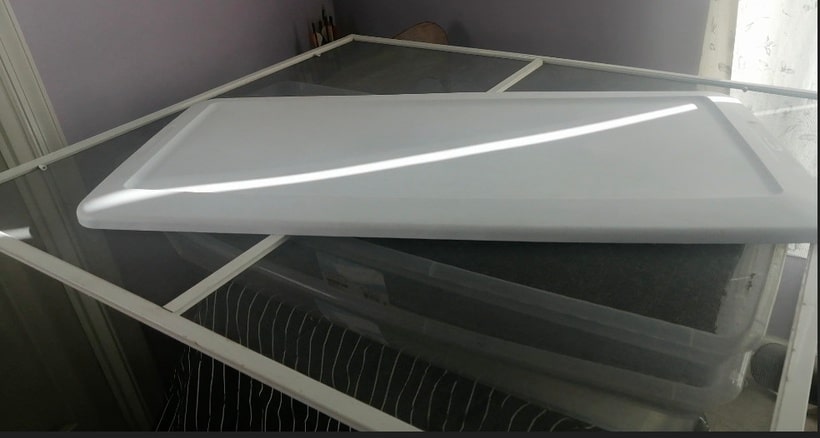
Unmodified Tote Setup: Creating the Ideal Microclimate
The beauty of this tek lies in its simplicity. You’ll need two identical shallow totes. One tote will hold the substrate and spawn mixture. The second tote acts as a warm water bath, heated with an aquarium heater set to 82°F (28°C). Submerging the substrate tote in the warm water bath creates a humid and temperature-stable environment, ideal for Pan Cyan growth. Photos below courtesy of GORDOTEK and his original post found here.


Casing and Fruiting: The Final Stages
Once the substrate is fully colonized, apply a thin layer of casing over the surface. This casing layer, a mix of peat moss, vermiculite, and calcium hydroxide or calcium carbonate, helps retain moisture and stimulate pinning. Mist the casing heavily with water to initiate fruiting conditions.
For fresh air exchange, cover the tote with a window screen. This allows for passive gas exchange while maintaining humidity. Prop the lid at an angle to create openings, further enhancing airflow. Maintain high humidity by misting the casing and screen multiple times a day, ensuring the environment remains consistently moist.


Harvesting and Beyond: Reaping the Rewards
Harvest your mushrooms when the caps begin dropping spores, a sign they’ve reached maturity. Clean the substrate between flushes to remove any debris and spent mushroom material, promoting healthy growth for subsequent flushes. This setup can support multiple flushes, offering significant yields with minimal intervention.
Tips and Troubleshooting: Navigating Challenges
- This tek is adaptable for other species like cubes and natalensis, with slight adjustments to temperature and humidity.
- Consider automating misting with a reptile mister for hands-free humidity control, ensuring consistent moisture levels.
- Manure in the substrate is recommended for Pan Cyans but optional for other species. Experiment to see what works best for your chosen strain.
- A higher spawn-to-substrate ratio promotes faster colonization and potentially more flushes.
- Address aborting pins by ensuring proper fresh air exchange and consistent misting. Maintaining optimal humidity levels is crucial for preventing aborts.
This comprehensive guide provides a detailed roadmap for cultivating Pan Cyans using the unmodified tote tek. By understanding the species’ unique needs and following these simple techniques, you can achieve impressive results without relying on complex equipment or extensive experience. Embrace the journey, and you’ll be rewarded with a bountiful harvest of potent Pan Cyans.