How to Inoculate Grain Spawn Bags
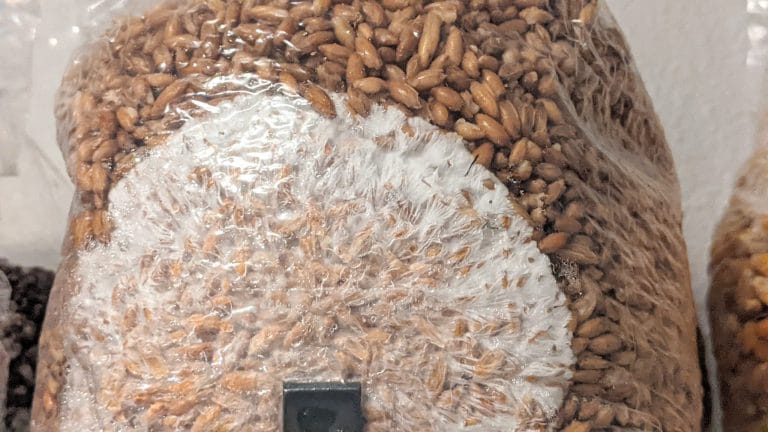
Grain spawn bags are one of the easiest ways to grow mushrooms. The design of these bags allow for the sterilization of spawn substrate, have an injection port for inoculation of cultures, and have an integrated filter patch, which allows the co2 produced by growing mycelium to escape. This article will focus on how to inoculate grain spawn bags using a culture syringe.
How to inoculate a grain spawn bag using a spore syringe or liquid culture syringe
Choose a suitable working area with little or no air-flow. Wash your hands, brush your teeth, and slip into a clean pair of clothes.
- Put on a pair of latex gloves.
- Wipe down all working surfaces, utensils, and the grain bag using 70% isopropyl alcohol.
- Wipe down the black injection port using an isopropyl alcohol wipe.
- Remove the cap from the syringe and flame sterilize the needle using a lighter. Make sure the tip of the syringe gets red hot, then remove it from the flame and allow it to cool for a few seconds.
- Insert the needle into the bag and inject 3-5 cc’s of the liquid culture.
- Remove the needle, wipe down with iso and replace the cap.
Set the bag aside in a dry dark place for colonization. Ideal temps for this process are approximately 78 degrees F, however, lower temps will not stop the process, but may result in longer colonization times.
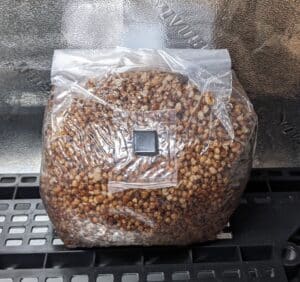
After 5-10 days the bag should be 60% colonized. At this time you may break up the mycelial mass and distribute the colonized grains with the un-colonized grains. This step is not necessary, however, it may help speed up colonization. To do this simply squeeze the mass until it begins to break up. Do your best to spread the colonized grains around the bag.
Once the bag is fully colonized you can either fruit from the bag or “birth” the colonized grains to a monotube using a bulk substrate.
Below you will find a video of this process provided by our friends at Milliken Mushroom Supply