

WBS Tek – How To Prepare Wild Bird Seed for Mushroom Cultivation
Curious if you can truly cultivate mushrooms using wild bird seed? The answer is a resounding yes! Wild Bird Seed (WBS) Tek has gained immense popularity among home growers and mushroom cultivation enthusiasts due to its affordability, ease of use, and proven effectiveness as a mushroom spawn substrate. This comprehensive guide will walk you through the WBS Tek process, empowering you to prepare wild bird seed for successful mushroom spawn jars or bags.
Why Wild Bird Seed Tek?
Cost-Effective: WBS is a budget-friendly option, making mushroom cultivation accessible to everyone.
Readily Available: Easily sourced from local stores, including major retailers like Walmart.
Effective Results: Proven to support robust mycelium growth for a variety of mushroom species.
Beginner-Friendly: A straightforward process, ideal for those new to mushroom cultivation.
Materials you will need for WBS Tek:
- Bird Seed
- Strainer
- Water
- Container for soaking/cleaning/boiling – 5 gallon bucket or large pot
- Pressure Cooker for sterilization
- Spawn Mason Jars or Spawn Bags
- Tin Foil
Step 1: Buy Bird Seed
I know what you’re thinking… “Isn’t birdseed, birdseed?”. Well, not exactly; not all birdseed is created equal and for this to work you will want to use a simple, no frills birdseed.
The higher quality seed will often contain additives such as vitamins and minerals to keep our feathery friends plump and healthy. These additives will not help our mission.
With that said, the cheaper the bird seed the better. You can find a 10 pound bag at Walmart for less than $8.

Step 2: Rinse, Remove Floaters, Repeat
Now that we have our birdseed, its time to clean it and remove the impurities.
Open your seed and pour a desired amount into a large pot or container for a quick rinse. The amount you use will vary based on your needs, but for this article we will be filling quart mason jars and will use 1/2 a quart jar of dry seed for each hydrated spawn jar we will be making.
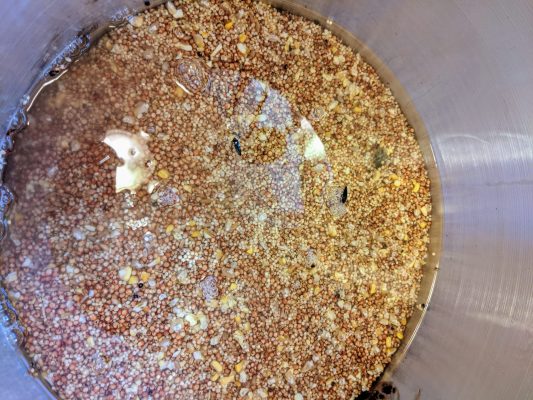
Fill your container with tap water until your seeds are a few inches below the surface of the water.

You will notice at first that the water is very dirty and that some seeds will float to the top; we will be removing this top layer of “floaters”.
Remove the floaters with a strainer or using a slotted spoon.
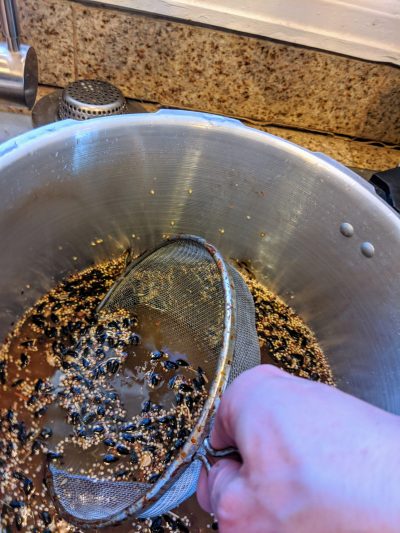
Next we will be pouring out the dirty water and repeating the process until our water runs clear and there are no more floaters.
Make sure to pour out the dirty water over a strainer to catch any good seed that happens to pour out when draining the water.
Step 3: Soak and Simmer
Once your seeds are clean you will fill your container back up, submerging the seed in 1-2 inches of water.
Place a lid on your container and set aside so that your seed can soak for 24 hours. This step is important for two reasons.
- To soften the grain and allow for adequate moisture absorption.
- Hydrates dormant contaminants (mold, bacteria, etc.), which makes them easier to kill during the sterilization process.
After such a long soak, it’s really not necessary to boil, however, some growers use this step as an additional measure to kill contaminates.
For this tek we will bring the water to a simmer and then immediately remove as to avoid overhydration.
Place the pot on the stove over medium-high heat. Stir occasionally as the water heats up. Once the water reaches a consistence rolling simmer, remove the pot from the heat and pour out the seeds into a strainer to dry off.
Step 4: Chill, Fill, and Kill (contaminants)
Before loading our seeds in to our spawn vessel jars we need to dry the excess moisture off.
Let the seeds sit in your strainer for 30-60 minutes, shaking every ten or so minutes. You will know they are ready when the outside of the grains appear dry and/or the grains leave very little moisture when placed on a paper towel.
Once dry use a spoon to fill your spawn jars up with the grain. I generally fill my jars 3/4th to 5/6th of the way full then place the lid on and screw until it is barely tight. Do not over tighten.
Place a piece of tin foil over the top of the spawn jar lid to keep moisture off the lid during sterilization.
Add water to your pressure cooker insuring the water is at least 2 inches deep.
Pack your jars in the pressure cooker, seal, and put on high heat until the pressure reaches 15 PSI. At that point lower the heat to maintain that pressure for 90-120 minutes.
Remove from heat and let cool for 18-24 hours. Use within three weeks.
sponsored products

Can I use WBS for bags instead of jars?
Yes you may!
I’ve got mycelium staring in my bags!! Thanks
How is there no step for sterilization? Especially since most WBS has corn or sunflower seed and tons of other grains, there are heat-resistant bacteria that can survive a brief boiling water. All you list is “sterilize.”
You should note that the 24 hour soak helps kills bacteria, and a (brief) boil after the soak also helps kill heat resistant bacteria (boiling more than a few minutes can over-hydrate, especially after 24 hour soak.)
THEN PRESSURE COOK! Or at least fractional sterilization aka steam sterilize in a big pot with an inch of boiling water and tight fitting lid. Without pressure cooking, your WBS will have a 95% chance of contamination. At least 60-120min in PC/pot, but that will also slightly hydrate the WBS as steam inevitably slips through the foil wraps. So to account for that you should also mention that the seeds need to be DRY dry after the soak and/or boil.
They should be completely dry to the touch, the drier the better (at least a few hours after straining water), and leave no visible water residue on a paper towel. Jars should be wrapped tight in NUMEROUS layers of aluminum foil to avoid too much hydration during pressure cooking, or else you’ll end up with wet seed and that will 100% lead to contamination.