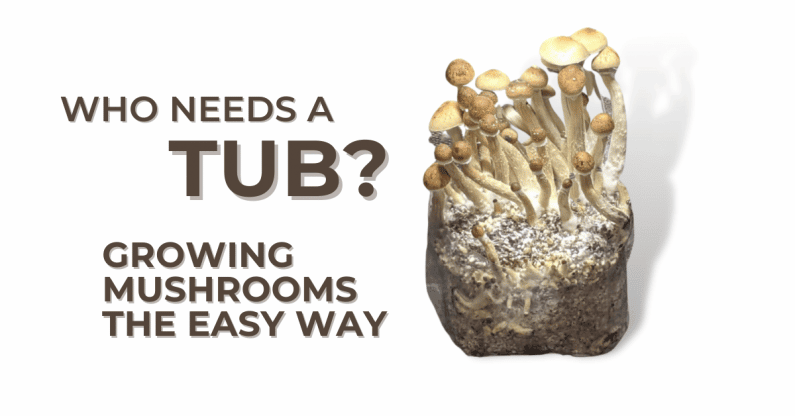
The Easiest Unmodified Monotub Setup: Maximize Yields with Minimal Effort
Looking for the simplest and most efficient way to grow mushrooms at home? This guide details my proven, unmodified monotub technique using readily available Sterilite® Air Tight Storage Totes. I’ve streamlined the process to minimize maintenance and maximize yields, making it perfect for beginners and experienced growers alike. We’ll focus on the 32 and 54-quart sizes, which I’ve found to be optimal.
Why This Monotub Setup is Superior:
- Unmodified Simplicity: No drilling, no filters, just straightforward growing.
- Optimal Air Exchange: Utilizing the Sterilite® tote’s lid design for natural airflow.
- Reduced Maintenance: Minimal misting and no fanning required.
- Faster Colonization & Fruiting: Achieve quicker results with optimized conditions.
Choosing Your Monotub Container:
I recommend Sterilite® Air Tight Storage Totes (Transparent with Aquarium Blue Latch) in 32 or 54-quart sizes.
While other clear lid tubs may work, this guide is based on my experience with Sterilite® totes. If you experiment with other tubs, ensure you understand the principles of air exchange and moisture regulation.

Essential Supplies:
- Sterilite® Air Tight Storage Tote (32 or 54 qt)
- Grain Spawn (3-5lbs)
- Substrate (Coir, Vermiculite – 5-10lbs)
Step-by-Step Monotub Setup:
- Spawn and Substrate Preparation:
- Grain Spawn (Oats): Learn how to make grain spawn here.
- Substrate (Coir): Simple substrate recipe here.
- Mixing and Filling:
- Spray all tools and containers down with 70% Iso Alcohol.
- Using a black, unscented trash bag, cut the bag in a rectangular shape for the liner. The size will depend on the size of your container, but generally I use the top of the container as a guide, cutting a little larger than the top.
- Spray Iso on the sidewalls and bottom of the tub and set your liner.
- Begin with a layer of substrate about an inch thick. Then add a thin layer of spawn, followed by a thin layer of substrate, and repeat until the spawn is gone. You will want to finish with a shallow layer of substrate as a “psudo-casing” layer. This will serve as a protective mat over the grains.
- Mist the sidewalls of the tub with distilled water.
Growing Conditions: The Key to Success:
- Lid Placement:
- Flip the lid upside down. This creates essential air gaps around the latches, providing consistent fresh air exchange (FAE) and regulating moisture.
- Never latch the lid.
- Immediate Fruiting Conditions:
- Contrary to traditional methods, I initiate fruiting conditions immediately after mixing spawn and substrate. This has resulted in faster colonization, pinning, and harvest times.
- I call this simply “Growing Conditions” to eliminate the distinction between colonization and fruiting.
- Moisture Management:
- Monitor surface moisture. Mist lightly if needed, but often, no misting is needed.
- Sometimes, removing the lid for short periods is necessary to reduce excess moisture.
- Bottom watering can be used after pinning for subsequent flushes.
- Develop an understanding of your surface conditions. Skill and experience are vital.
Lighting:
- Use fluorescent if able.
- Shop lights are ideal for multiple tubs.
- While mushrooms don’t photosynthesize, adequate light promotes healthy growth and appearance.
- Fluorescent lighting is more efficient than LED for this application.
Tips and Best Practices:
- Surface Conditions: Maintain optimal surface moisture for successful fruiting.
- No Casing Layer (Usually): I find casing layers unnecessary in most cases, especially with 10-20% RH. A thin pseudocasing of coir can be useful for slower pinning varieties like PE.
- No Liner (Recommended): Proper surface conditions and a level substrate eliminate the need for liners.
- Stacking: Sterilite® tubs can be stacked for space management. Place colonizing tubs on top for slightly warmer conditions.
- Watering: Only water when needed. Bottom watering is useful for later flushes.
Timetable, Yields, and Biological Efficiency (BE%):
- Fastest Possible Timeline (Agar to Harvest): 25 days (best case).
- Yield: 1-2 oz dry per quart (MS cultures), more with clones.
- Substrate: Oats and CVG only.
- Cost Efficiency: Under $1 per ounce once established.
- BE Calculation:
- Dry ingredients: 650g coir + 220g dry oats per quart.
- 100% BE = 350g wet per quart.
- 1oz dry per quart = ~114% BE.
- 2oz dry per quart = ~228% BE.
Conclusion:
This unmodified monotub TEK provides a simple, efficient, and cost-effective method for growing mushrooms. By understanding the principles of air exchange and moisture management, you can achieve consistent and impressive yields.